As a Category or Event Manager, you can add hidden manager-only fields to the registration form. These fields can be used by event organizers to share internal comments on registrations. To add such fields, on the high-level, you should complete the following steps:
- Step 1: Access the registration form field editor on your form.
- Step 2: Create a separate section on the registration form and set it as Manager-only.
- Step 3: Add one or more hidden fields.
- Step 4: Fill out the manager-only section for a registration.
- Step 5: Display management comments on the Registration List.
Step 1: Access the registration form field editor
Prerequisite: Your registration form should already be created. To learn how to create a new form, see Create a registration form.
- From the left pane of your event management area, go to Organisation > Registration, scroll down to the List of registration forms.
- Click Manage next to the registration form you want to edit.
- Click the Configure button in the Registration Form section.
The following screenshots show the above steps:


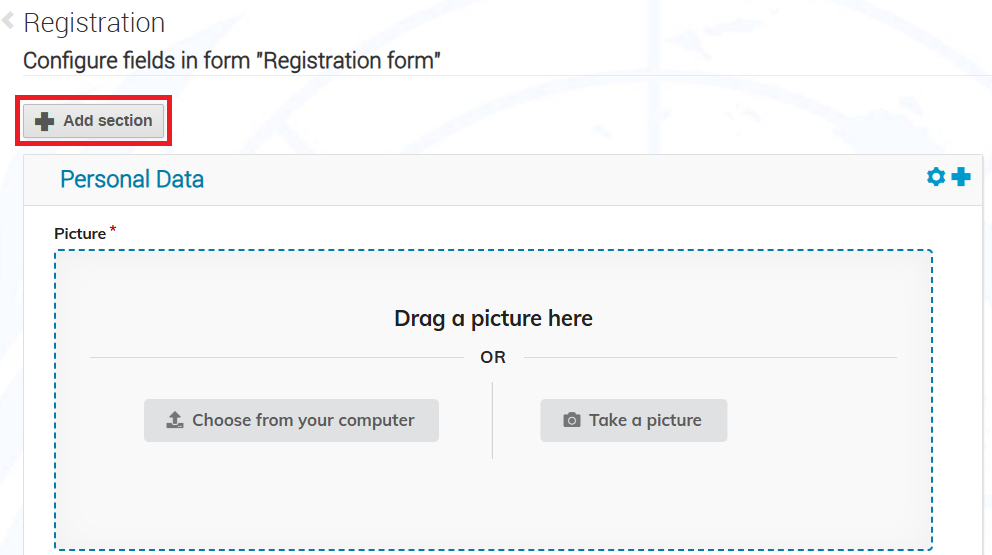
Step 2: Create a separate section on the registration form and set it as Manager-only
Click Add section on top of the page.
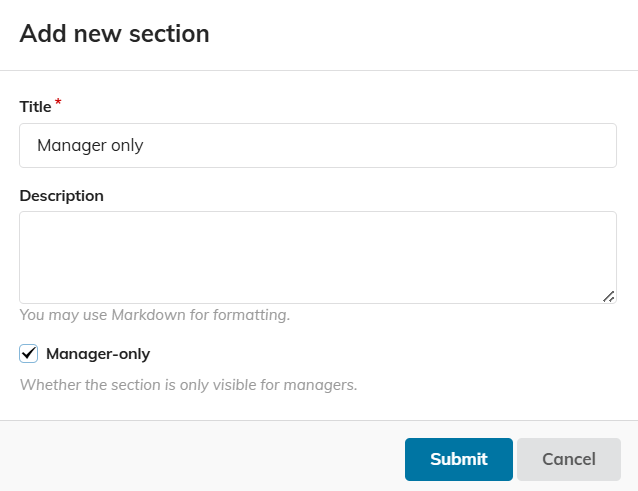
Set the following:
- Title: Mandatory. Section title to appear on the form.
- Description: Optionally, provide a description of the section, which will appear on the form.
- Manager-only: Enable the checkbox.
 When assigning Focal Points, you can give them permission to view fields in the Management section by giving them the Admin section permission. To learn more, see Assigning Focal Points to the event.
The manager-only section is highlighted in yellow on top and has an icon to indicate that it’s different from the other sections:

Step 3: Add one or more hidden fields
In the top right corner of the new section, click the plus button ![]() and add fields, as required. Note that:
and add fields, as required. Note that:
- You need to add at least one field to the section to be able to use it.
- You can add any field types and any number of fields, depending on your needs. For a full reference of the different fields, see Add and edit fields on a registration form.
- Fields added here will not be visible to participants when they first fill out their registrations.
Step 4: Fill out the manager-only section for a registration
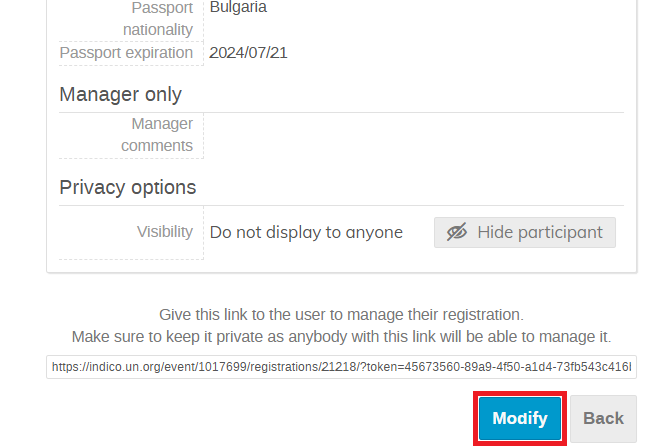
To provide information for a registration in the manager-only section, you should modify the Registration Summary:
- From the Registration List, find the registration you want to modify and click the registrant’s name, so you access the Registration Summary. For a detailed procedure, see Overview of the Registration Summary.
- Scroll down to the bottom of the page and click Modify.
- Fill out the required information.
- Before you save the changes, make sure to switch OFF the Management Options toggle.
When this toggle is on, the participant receives an email notification that their registration information has been modified, which in this case is not relevant to them.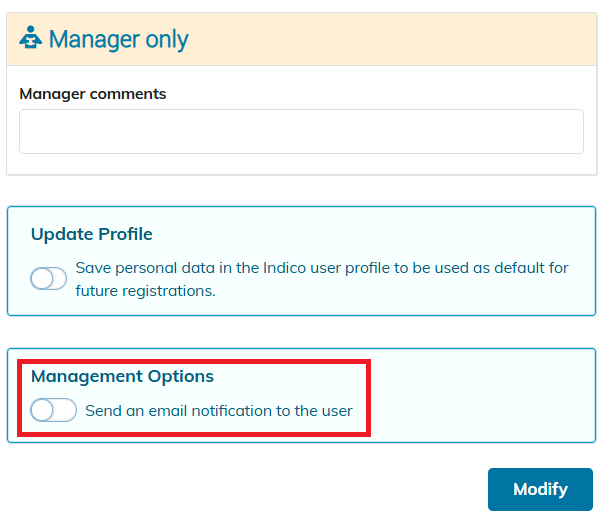
- When done, click Modify.
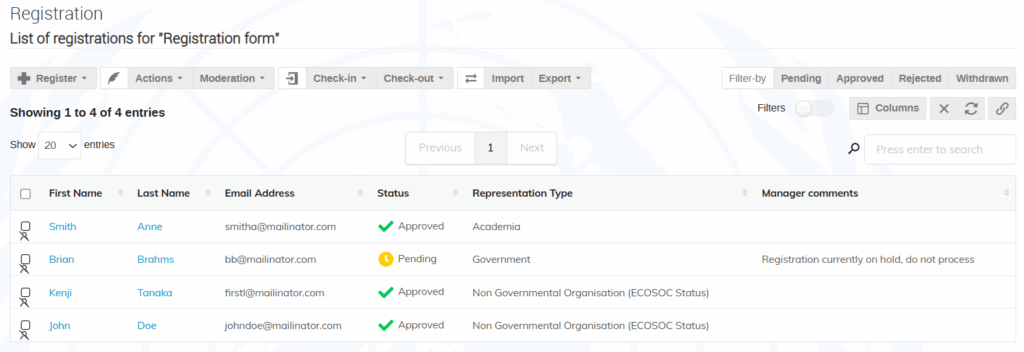
Step 5: Display management comments on the Registration List
To have better visibility, you can display the field(s) from the manager-only section as separate column(s) on the Registration List.
- Go to the Registration List. To learn how, see Access the Registration List.
- Click the Columns button in the upper-right area.
- Find and select the field(s) from your manager-only section. When highlighted in blue, the fields will be displayed as columns.
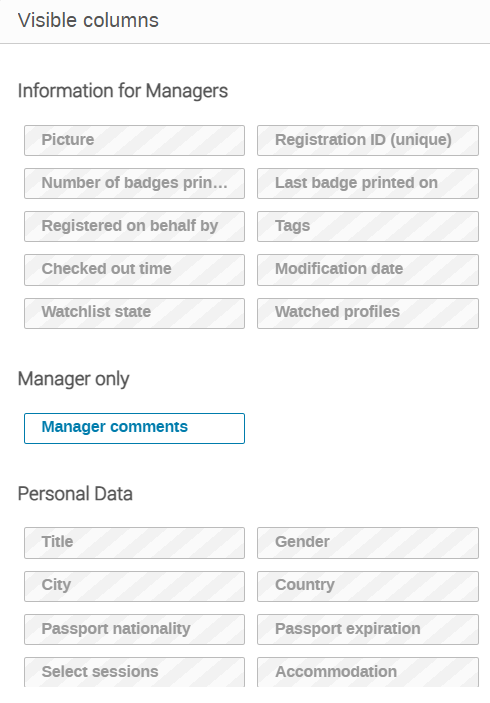
- Click Save.
Your custom hidden field(s) are now visible on the list.