In some cases you may organize a complex event featuring a main event and multiple side events, where some participants will register for the main event and have access during the entire event period, while others will only register for one of the side events and have limited access, for example only during certain days.
In Indico.UN you can make use of the Sessions feature when creating a main and side events. To do this, on the high level:
- Category Manager only: Create the main event and set the name, location, arrangement type, contact, etc. Prepare and schedule the Registration Form for the main event.
- Category Manager only: Clone the main event and add a “side events” suffix to the event name.
- Category or Event Manager: On the Sessions page create as many sessions (side events) as you need.
- Category or Event Manager: Edit the Timetable by adding the sessions (side events) in session blocks. You can have session blocks happening at the same time in different rooms, or even different venues.
- Category or Event Manager: Edit the Email templates for registration and approval confirmation by adding the {registrant-sessions} placeholder, so that Registrants see the session they registered for in the email.
- Category or Event Manager: Prepare the registration form for the side events and make sure that you Enable Sessions in the form.
- Category or Event Manager: Open or schedule the side events for registration.
LIMITATION:
You CANNOT appoint different people to manage registrations for different side events (sessions) when using this approach. If you require different people to manage the registrations for each side event, consider creating them as separate Indico.UN events.
The above steps include the minimum steps you need to complete in order to prepare your main and side events. You can set other configurations to both events, including attaching materials, appointing Focal Points or Registrations Managers, etc.
Following are detailed procedures for each of the high-level steps:
To create and setup the main event
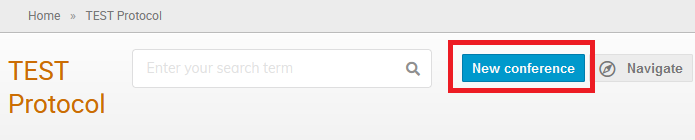
- Go to your Indico.UN category and click New conference.
- Give your event a name, choose the dates and location.
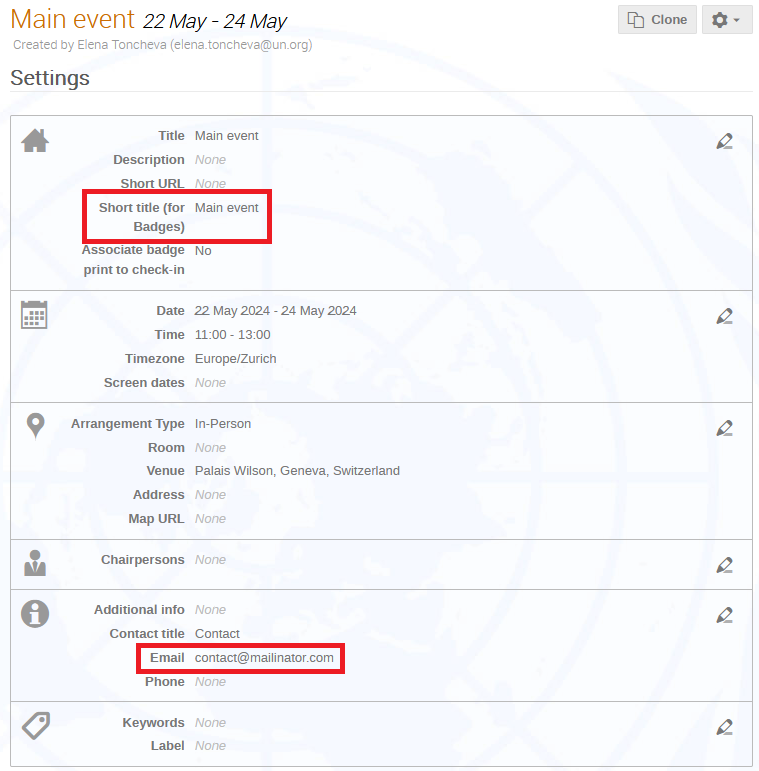
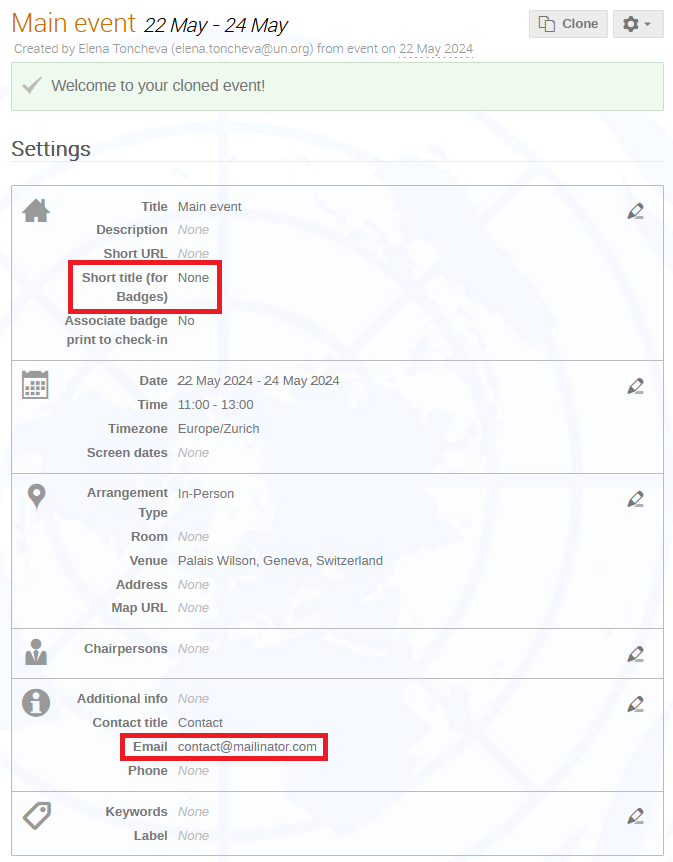
- In the event Settings page configure the rest of the details. Don’t forget to add a Short title (for badges) and Contact email, which are required for opening registrations.
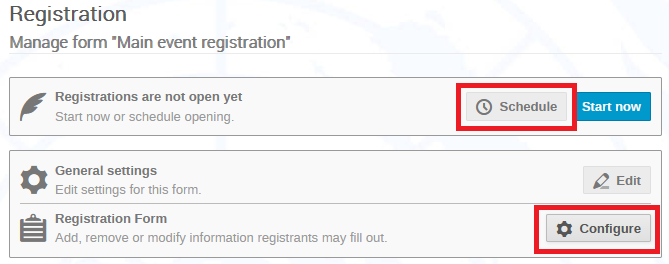
- On the Organisation > Registration page click Create form and give your Registration Form a name. Edit the form settings as required.
- If necessary, edit the fields by clicking Configure in the Registration Form section.
- Click Schedule and set the opening and closing dates for the main event registration.
To create the side event by cloning the main event
- On the main event management area click Clone.

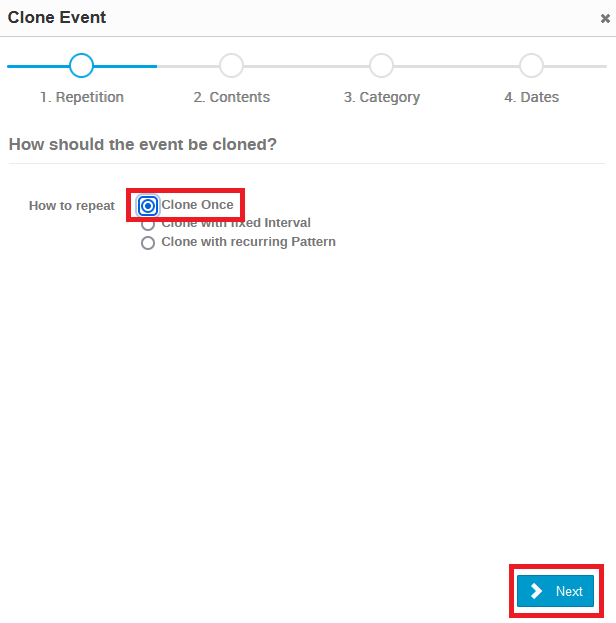
- On the Clone Event dialogue:
- Select Clone Once and click Next.
- Optionally, on the Contents screen select other items you want to clone, e.g., Materials. Click Next.
- On the Category screen select your category. Click Next.
- On the Dates screen set the starting date and time of your side events. Click Clone.
- Select Clone Once and click Next.
- Edit the title of your cloned event, e.g., keep the title of the main event and add “side events” at the end.
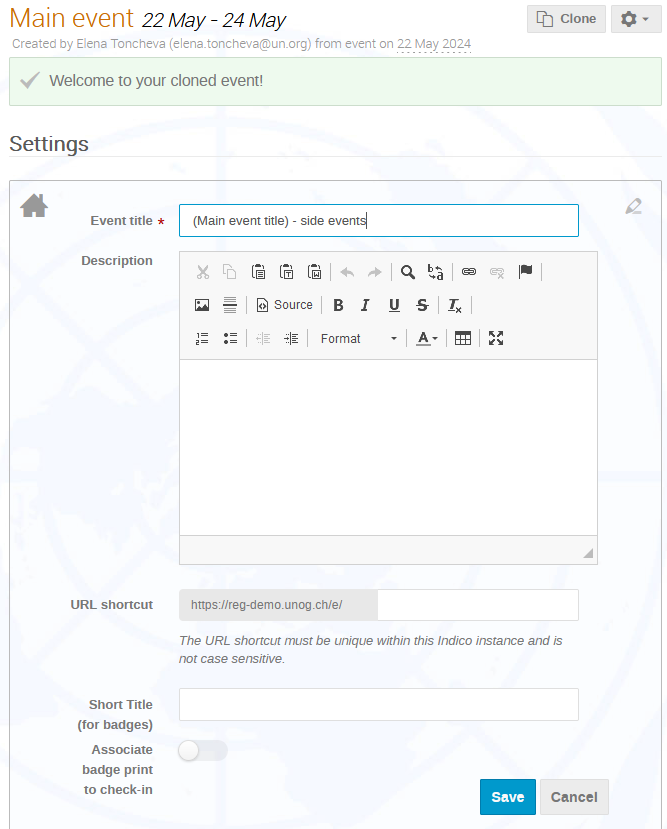
- Edit any other settings for the side event, as required. Don’t forget to set a Short title (for badges) and Contact email, so you can open registrations for the side events.
To create your sessions (side events)
- On the side event management area go to Organisation > Sessions.
- For each side event click Add new session and enter the side event name.

")
To add your side events in the timetable
- On the Timetable page click Add new > Session block and select the side event you want to schedule.
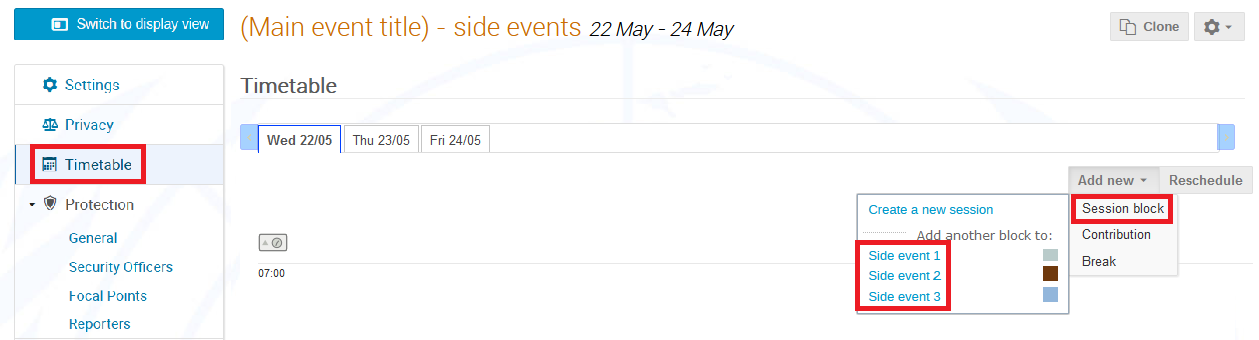
- In the Session block dialogue enter the start time and date for the side event and optionally select the room (or other venue if applicable).
Remember that the start/end times of items on your timetable can overlap, so you can schedule your side events to happen at the same time.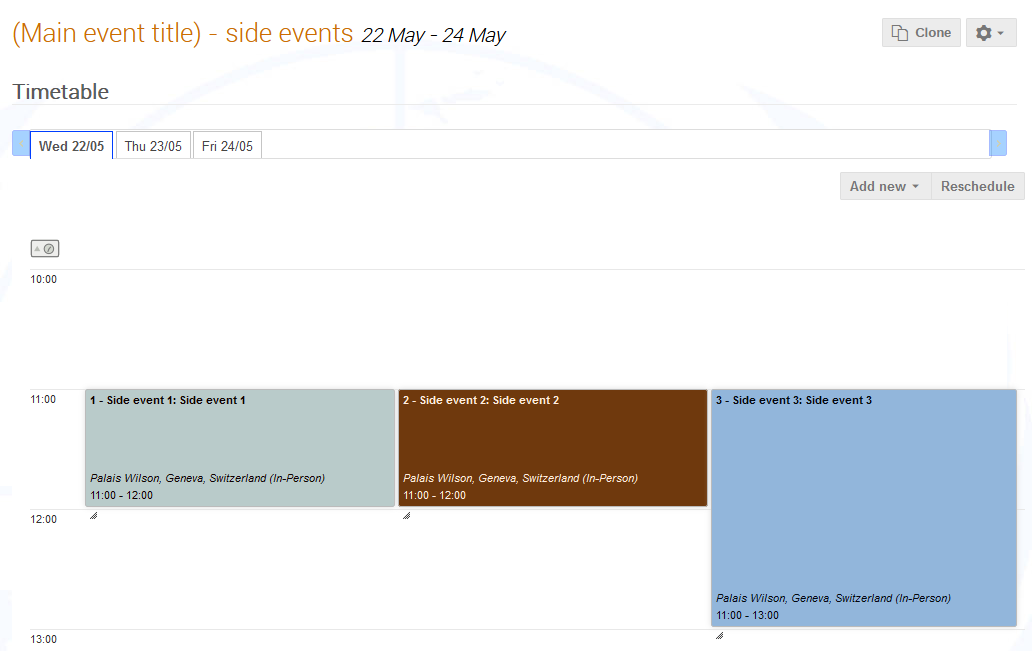
- When you are done, don’t forget to publish your timetable by clicking Publish contributions on the Timetable page.

To edit email templates by adding registered session
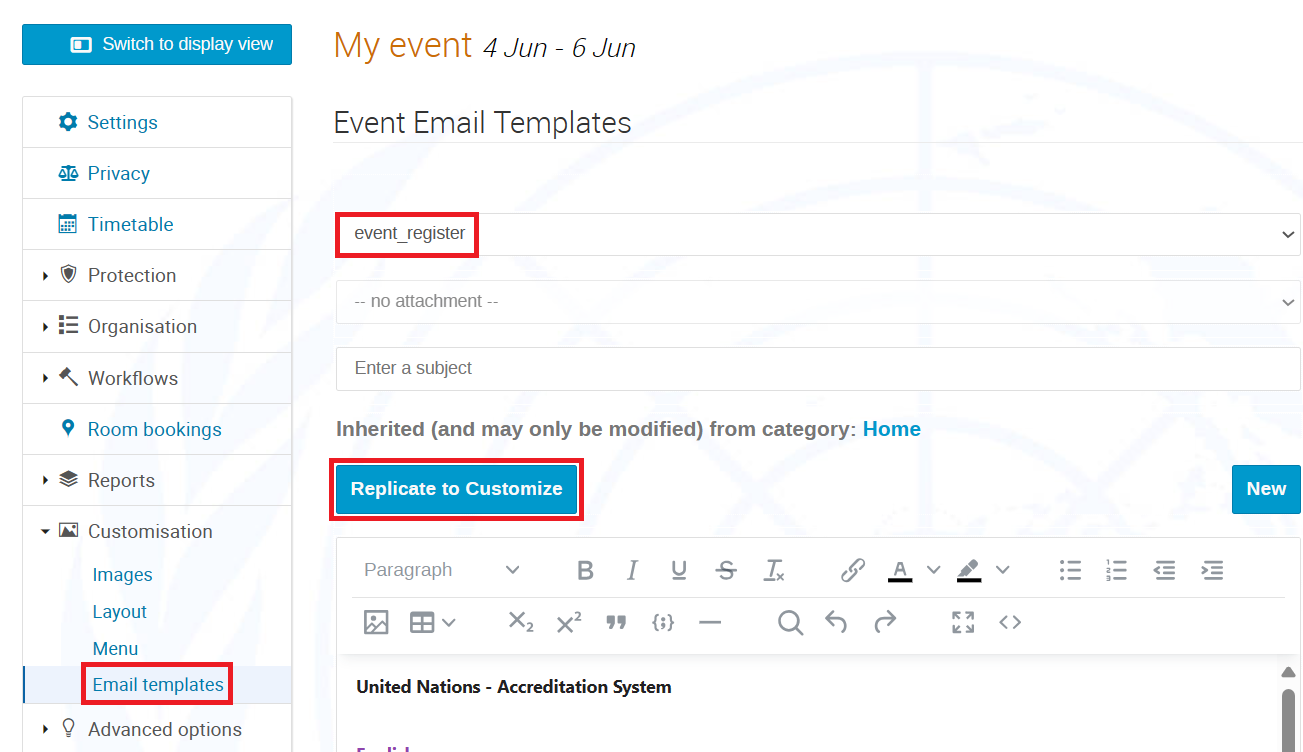
- Go to Customisation > Email templates.
- Select the event_register template and click Replicate to Customize.
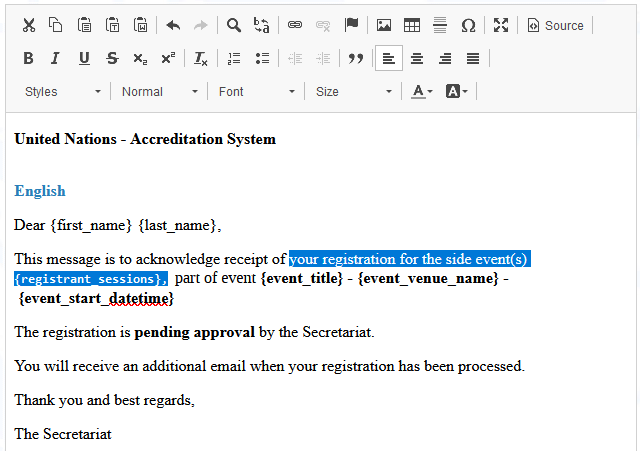
- Edit the email text by adding the {registrant_sessions} placeholder. Note that this holder is visible when you click show next to Other Placeholders in the right column.
- Click Save.
- Repeat steps 2 to 4 for the registration_approve template.
To prepare the registration form for the side events and enable sessions
- On the Organisation > Registration page click Create form and give your Registration Form a name. Edit the form settings as required.
- Click Configure in the Registration Form section.
- Click
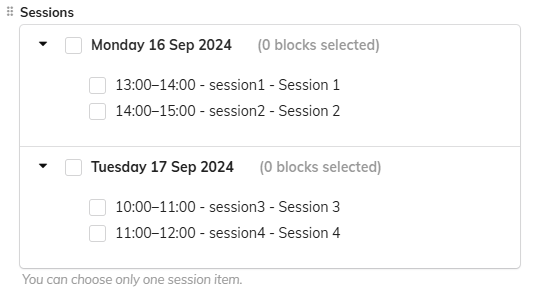
 (Add field) and select Timetable sessions. Provide the required field configurations. Optionally, set the minimum/maximum number of sessions that can be selected.
A new session selection field is added at the bottom of the form.
TIP: If you set a limit on the sessions selected, specify the limit in the field Description, so Registrants are aware.
To schedule registration for side events
- Go to Organisation > Registration and click Schedule.
- Set the opening and closing registration dates.
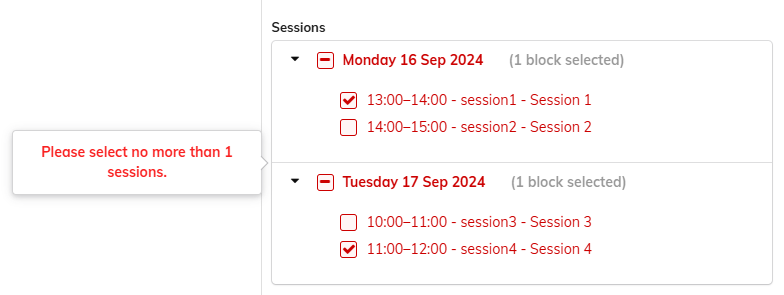
Once registration for side events is open, Registrants will be able to select side events when registering. Furthermore, if they will see an error message if they have selected less/more sessions than you have allowed: