You may post to a (category or event) page material for sharing with participants (e.g. files and hyperlinks). While you may post material directly to a page, it is recommended that if you are posting several items, to create folders into which materials of a similar subject matter or theme may be grouped.
Create a Folder
In the event management menu select Materials.
In the Materials window click New folder.
In the Create a new folder window, enter a name for the folder. (A description is optional).
You should leave the folder set as Always Visible.
Click Submit.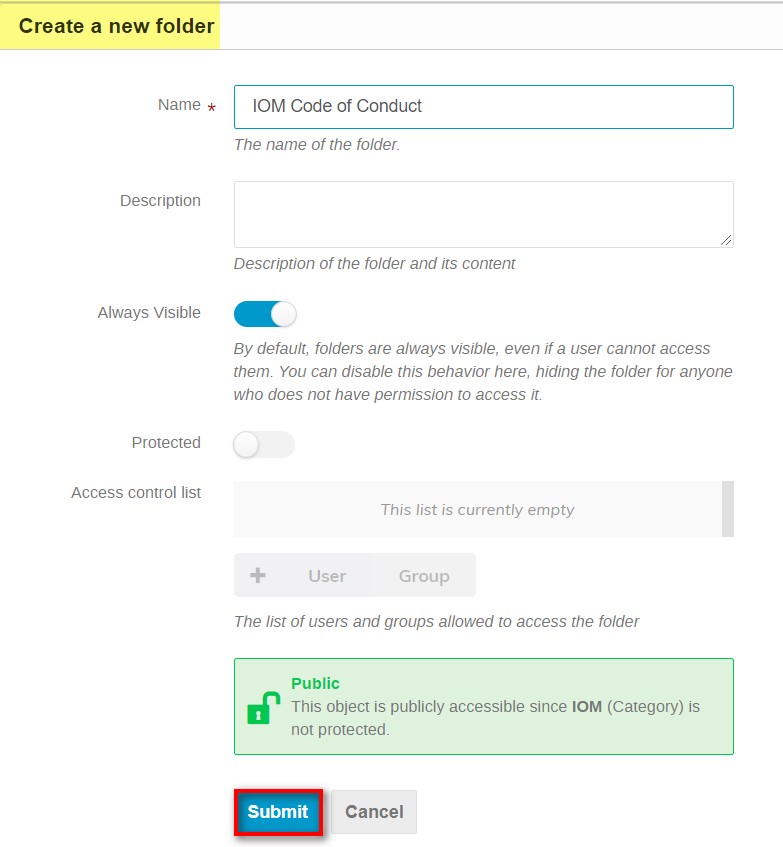
A message appears on-screen that the folder has been created.
As soon as you add material to the folder it will appear on the event page.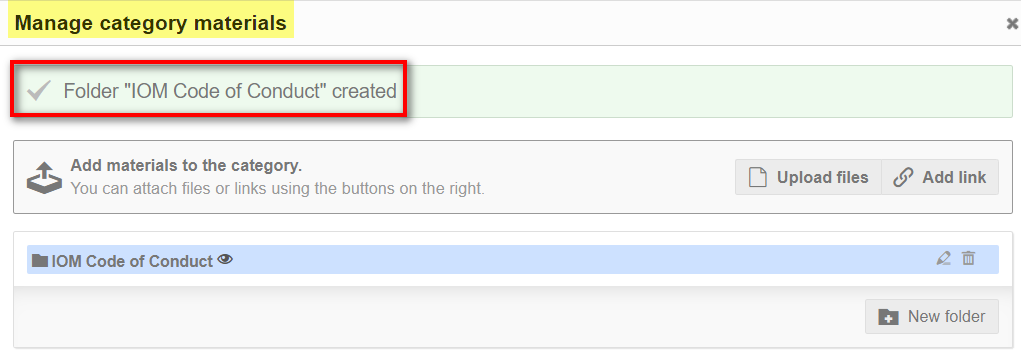
Protect a Folder
If a folder is to be accessed by specific persons only, then when creating it you should also set it as Protected
You may either search for and place users on an access control list OR you may restrict it to only those who are approved for the event. Pending registrants will have no access.
When a folder is protected, ALL its content inherits the protection too.
Protected folders appear on the page accompanied by a padlock icon.
If you do not want ALL the material in a folder to be protected, then do not apply protection at the level of the folder but rather at the level of the material itself when it is being uploaded to the folder. Any material protected within the folder will be accompanied by a padlock icon.
Add Material
In the event management area menu select Materials.
In the Materials window click Upload files.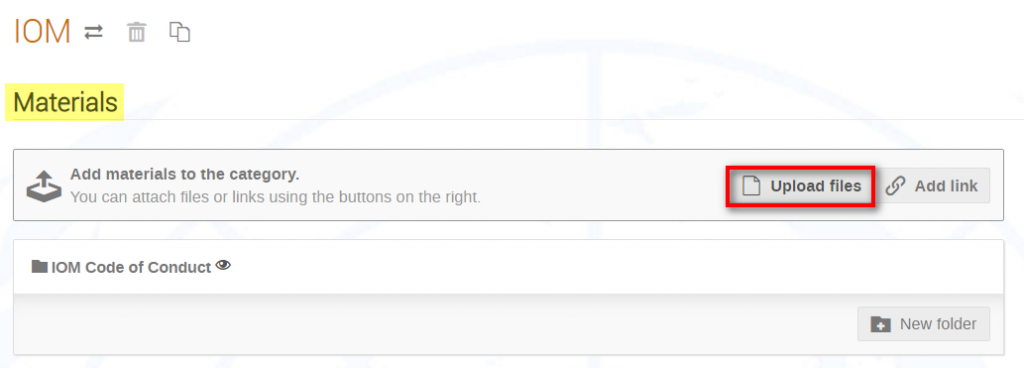
In the Upload files window, upload the material.
Determine whether the material is being posted onto the page directly OR into a folder that has been created.
Click Upload.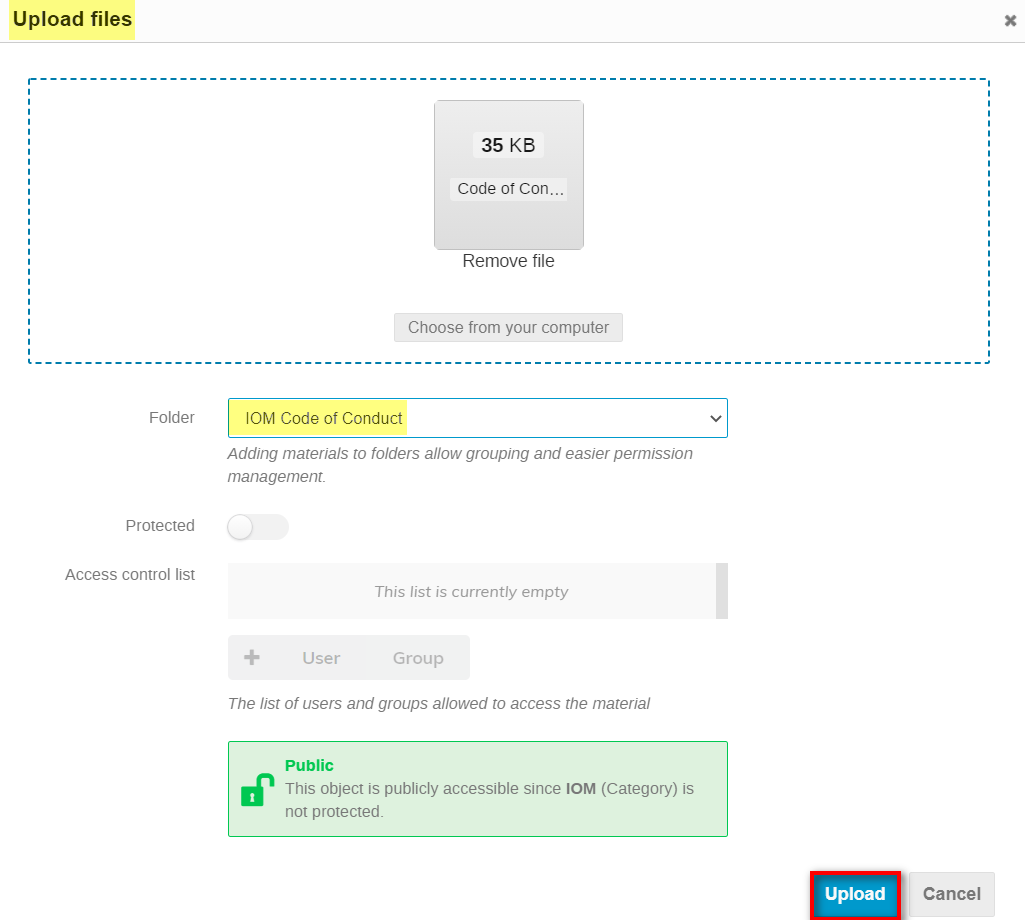
A confirmation message appears on-screen confirming that the attachment has been uploaded. If uploaded to a folder, it will display under the folder as content. 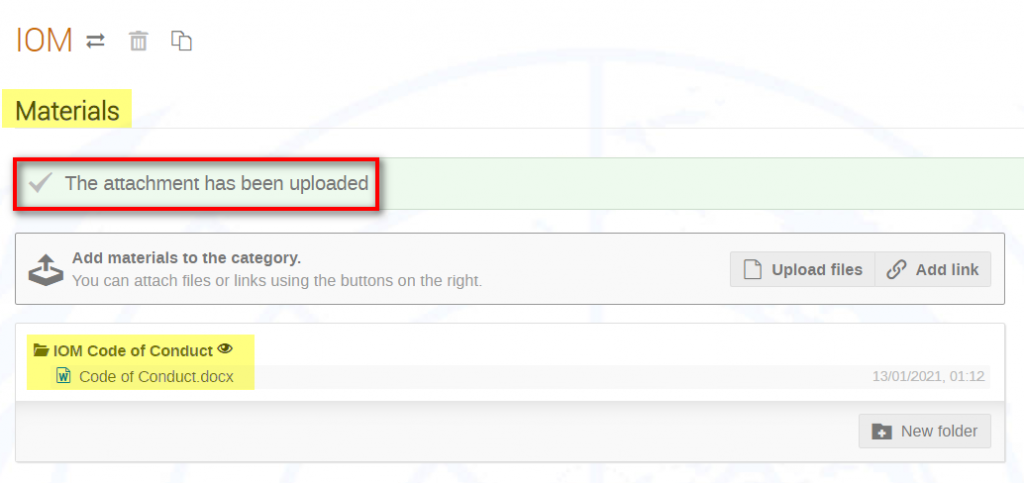
Protect Material
If material posted directly to a page or in a folder is to be accessed by only certain persons, then at the moment of upload set it as Protected.
You may either search for and place users on an access control list OR you may restrict it to only those who are approved for the event. Pending registrants will have no access.
It will be displayed accompanied by a padlock.
Add a Link
You manage links in the same way as material – they can be posted directly to a page or added to a folder and protected if necessary.
In the Manage materials window click Add link.
In the Add link window enter the URL of the link and the title of the link as you want it to appear. If the link is being placed in a folder, select the folder. Add protection (if necessary) in the same way as for files.
Click Submit.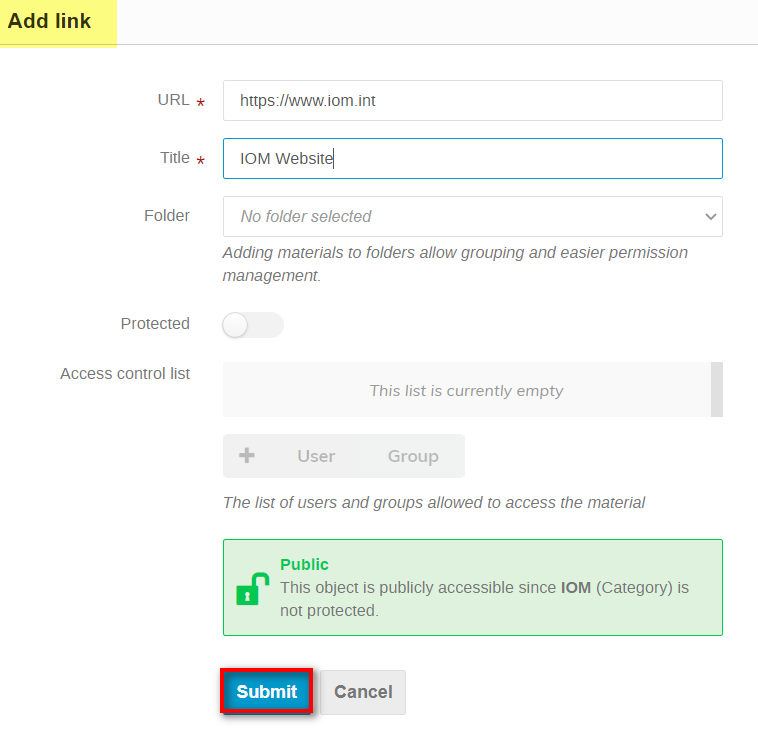 A message appears on-screen that the link has been added.
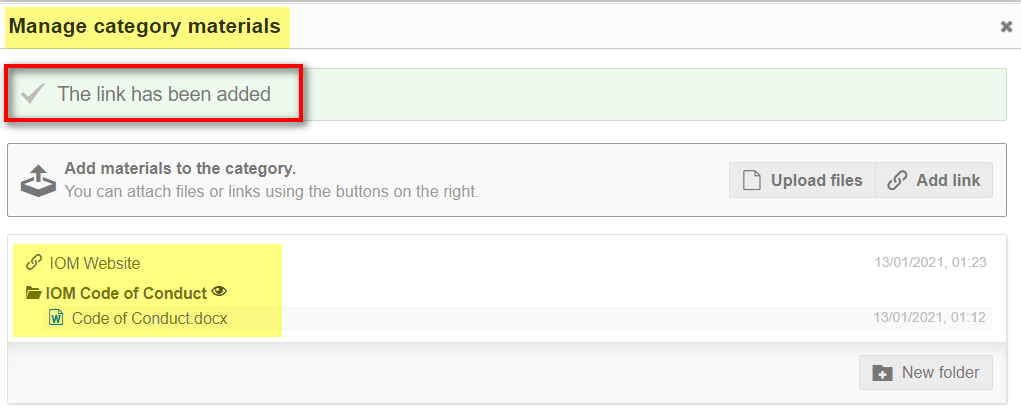
Go to the page to verify any materials, folders or links posted to it.
Quick Access to Managing Materials
On the (category or event) page, click the pencil icon beside Materials.
The Manage materials window opens. Proceed as already described.
Hovering the mouse over any material in the material management area reveals a ![]() which allows you to edit the details and settings of the material and a
which allows you to edit the details and settings of the material and a ![]() to remove it.
to remove it.