There are two steps to managing a registration form.
First, you have to CREATE it i.e. determine certain parameters.
Second, you CONFIGURE it i.e. determine the fields, sections etc. you want to appear on the form.
Step 1. Create a Registration Form
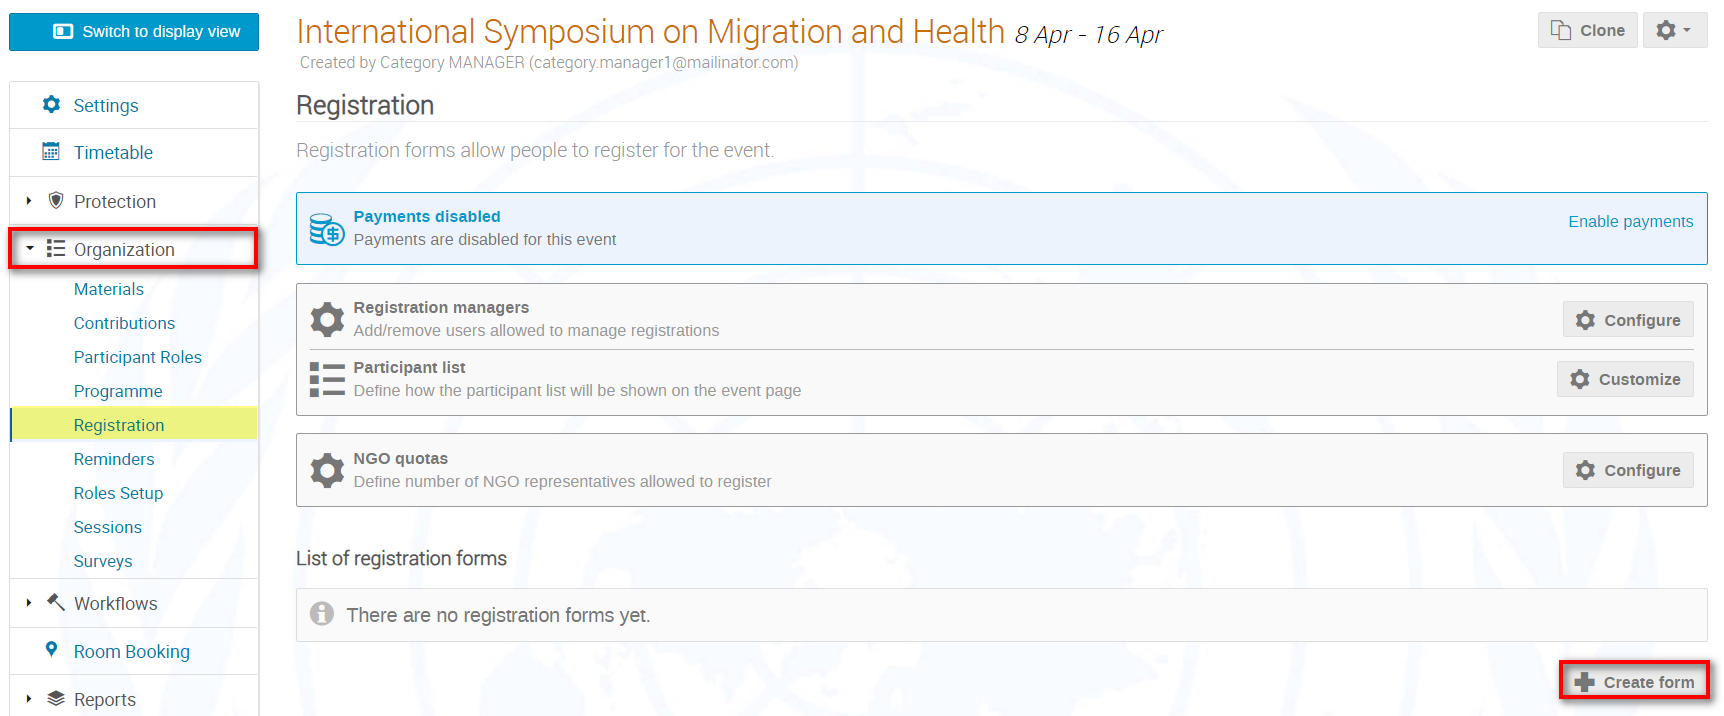
In the management area under Organization select Registration.
In the Registration window click Create form. In creating the form (giving it a name etc.) you determine the parameters surrounding the registration period as per the table below. 
Parameters to Apply when Creating a Registration Form
| Title | Name of the registration form |
| Introduction | A brief text or instructions for registrant’s |
| Contact info | An email or tel number where registrants can contact the organizer |
| Moderated | If disabled, registrations are approved automatically. If enabled, registrations are reviewed before being approved. |
| Only logged in users | Only logged in users can register |
| Registrant must have an account | Only those with an account may register |
| Limit registrations | Place a ceiling on the number of registrations |
| Modification allowed | If NEVER is selected, registrants are unable to make any modifications to their registration.
If UNTIL APPROVED is selected, registrants may make changes until they are approved. If MODIFICATION DEADLINE is selected, they may make changes to their registrations up to a given point but they must also be in pending status. |
| Publish registrations | Do not use |
| Publish number of registrations | Do not use |
| Publish check in status | Do not use |
| Attach iCalendar file | Attach an iCalendar file to the mail sent once a registration is complete |
| Hide representation type section | Do not use – this will hide the representation type section on the registration form and users will be unable to indicate their representation type (which is mandatory) |
| NOTIFICATIONS FOR REGISTRANTS | By default, registrants will always receive an acknowledgement of their registration. If you disable this feature, they will not receive a notification when they are approved, rejected or set to pending. |
| Notification reply-to address | Enter an email address as the reply-to of all notifications sent to users. If this field is left empty, then noreply@un.org is used. |
| Send copy to addresses | A copy of every email sent to registrants will be sent to the addresses as BCC. These emails contain sensitive personal information. |
| Message for unpaid registrations | Ignore |
| NOTIFICATIONS FOR MANAGERS | If you permit modifications to registrations, you may enable this feature which will generate a notification each time a registration is submitted or modified (whether it be by the registrant, manager or focal point). The persons you place on the list will receive the notification. Bear in mind that the persons on the list will receive notifications for ALL registrations modified. |
When you have created the form, click Save.
A message appears on-screen confirming that the form has been successfully created.
Step 2. Configure a Registration Form
Now that you have created a registration form you have to configure it.
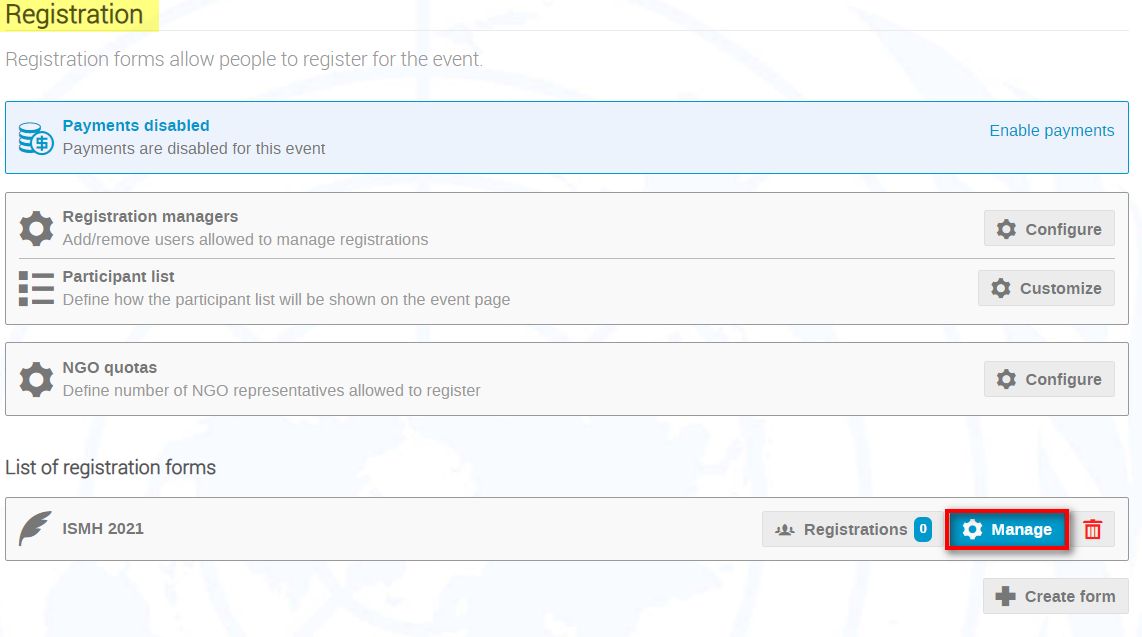
In the Registration window, click Manage beside the registration form.
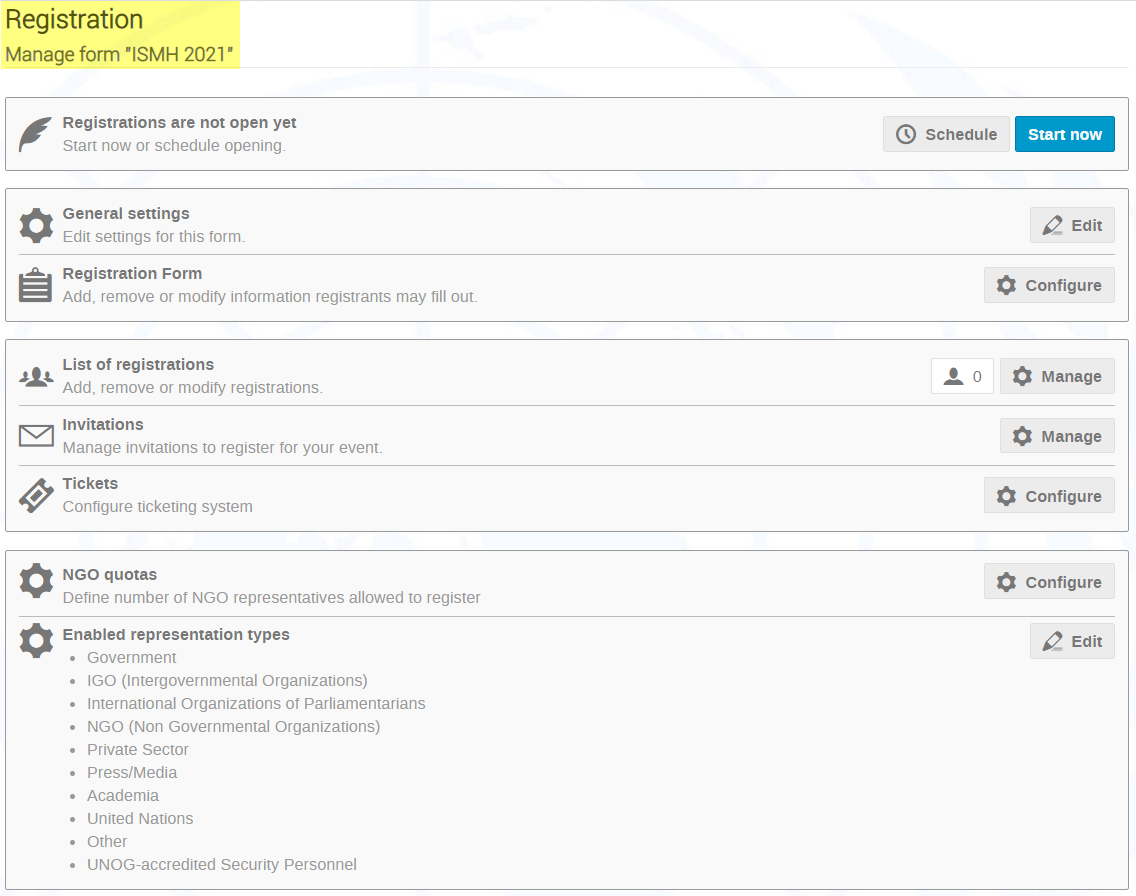
The management area of the form created opens.
Registrations are not open yet: This is where you open the registration period. You may schedule it to open and close on specific dates. Or, if you Start now, you will have to remember to manually close it. If you Schedule you determine the opening and closing dates. You may also enter here the date up to which pending registrations may be modified.
General Settings: This brings you to the parameters set out for the form when it was first created.
Registration Form: Configure the form (add sections and fields to sections to gather information on your participants). The Personal Data section appears by default. For events taking place at UNOG, this is a mandatory section that must not be disabled or the fields changed/removed without prior consultation with UNOG Security.
List of Registrations: view the registrant list.
Invitations: send invitations for your event.
UN Event Passes: determine how participants obtain their UN Event Pass.
NGO Quotas: This feature gives you options to control how many NGO representatives may be approved to attend your event. You may set:
- A general NGO quota (a limit on the total number of NGOs that may be represented at the event)
- An NGO quota per day (a limit on the total number of NGOs that may be represented each day of the event)
- An NGO quota per session (a limit on the total number of NGOs that may be represented at each session of the event)
- An NGO quota per each organization (a limit on the number of persons per NGO that may attend the event)
Enabled Representation Types: Indico has 10 default representation types that appear on registration forms for registrants to select from. Registrants should identify with one of the values. Some of these values you may exclude and will therefore be unavailable for selection by registrants.